XML sitemaps are one of the most misconceived pieces of the SEO equation.
I’ve come across SEO’s who couldn’t explain why they’re necessary, let alone tell you how to set one up “right.”
Here’s the rub:
Just as a map is essential to finding your destination by road, an XML sitemap is critical for search engines to locate your website URLs.
Without your URLs getting crawled, they’ll not get indexed, and your pages won’t rank (of course) without indexing.
In short, XML sitemaps play a crucial role in search engine optimization.
In today’s post, I will show you how to create an XML sitemap from scratch and optimize it perfectly for SEO, step-by-step. I’m covering:
- What is an XML sitemap
- XML vs. HTML sitemaps
- XML sitemap tags (and which ones you should use)
- XML sitemap examples
- Why do you need an XML sitemap
- How to create an XML sitemap
- Six best practices for sitemap.xml creation
Without further ado, let’s jump in.
How does your website score? Get a free instant audit that will uncover the biggest SEO issues affecting your site, and how to fix them.
What is an XML Sitemap? (And Why the Heck Should You Care)
In simple terms:
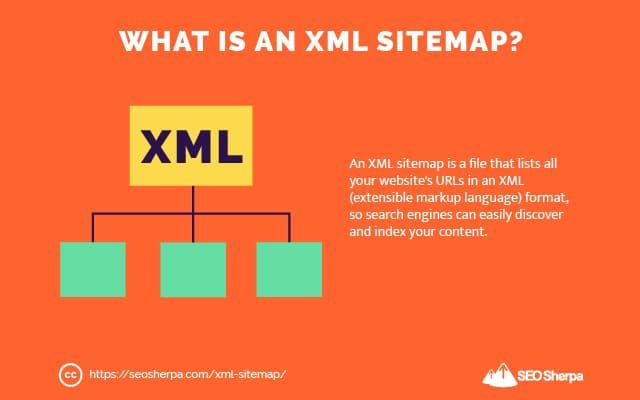
An XML sitemap is a roadmap for search engines.
It lists your website’s important content in XML format, so search engines can easily find and index your content and ultimately display it in search engine results pages.
You should list in your XML sitemap any webpage (or file) you want to display in search engines.
Why?
Because a sitemap ensures your content is discoverable.
Let’s say you have web pages that are not linked from anywhere on your site – or the web at large. If those pages don’t have hyperlinks pointing to them, they will not be findable by web crawlers.
An XML sitemap (submitted to search engines) ensures that search engines can find any pages you want to be included in SERPs.
But that’s not all.
You can use an XML sitemap to provide additional information to search engines, like when your content was last updated and which pages are higher priority. More on that later.
XML vs. HTML Sitemaps – What’s The difference?
You can add two types of sitemap to your site; an XML sitemap and an HTML sitemap.
- XML sitemaps use extensible markup language (XML)
- HTML sitemaps use hypertext markup language (HTML)
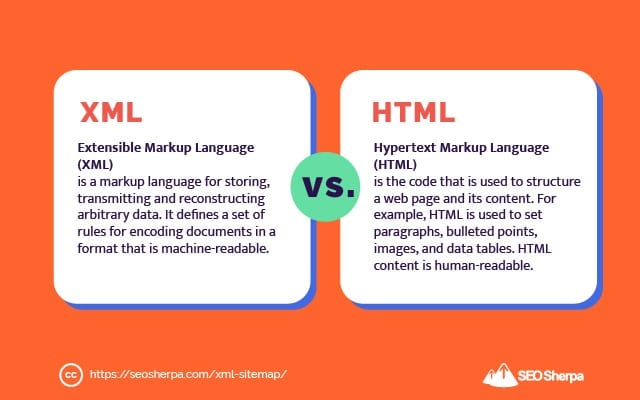
But aside from the code they use, they also serve different functions:
XML Sitemap
Let’s begin with an XML sitemap example:
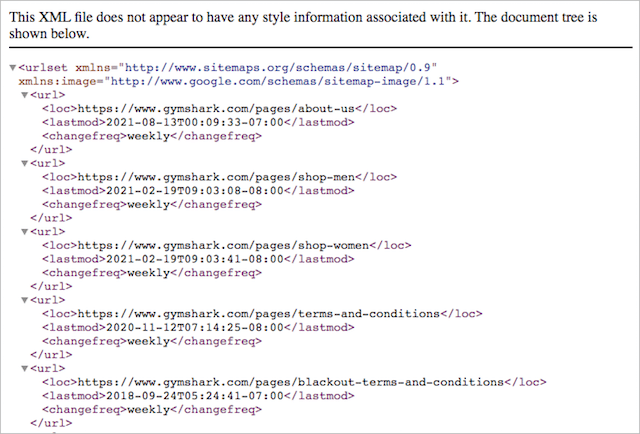
As you can see, XML sitemaps are not human-friendly.
XML sitemaps are feeds explicitly designed for search engines.
They help search engines like Google comprehend which URLs to crawl and what gets priority.
Plus, how often do those URLs change, and which new ones got added to the site.
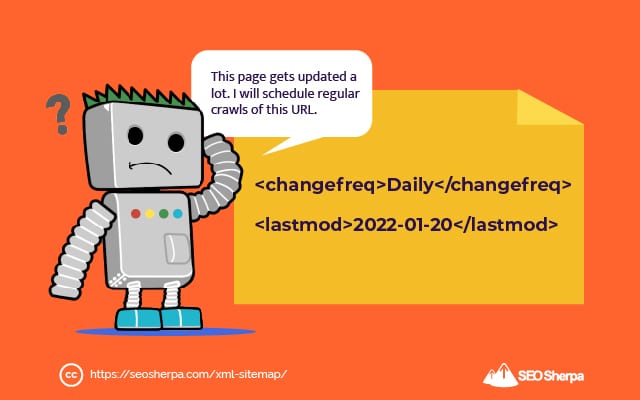
This information helps search engine schedulers better evaluate when and how often to recrawl a particular URL.
HTML Sitemap
Here is an example of an HTML sitemap:
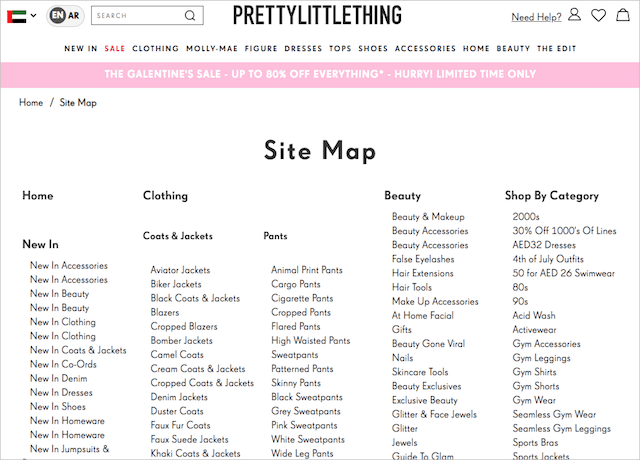
It looks very different from an XML sitemap.
That’s because it’s a web page designed for humans – as well as robots.
For humans, an HTML sitemap aids better navigation through a website.
From a search engine’s perspective, an HTML sitemap is a helpful tool for URL discovery (assuming the sitemap is being crawled and the links contained in the sitemap are followed).
But, that’s not their only value for SEO:
HTML sitemaps also distribute PageRank throughout a website.
Because HTML sitemaps are commonly linked from every page on a site (via a navigational link in the footer), they have a ton of PageRank flowing to them.
This means they can pass a boatload of their incoming PageRank to other pages on the website via internal links.
Got a page that’s ranking poorly?
Add that page to your HTML sitemap.
It can be a quick and easy way to give it a ranking boost.
What Does an XML Sitemap Look Like?
As I already pointed out, XML sitemaps are for search engines, not humans.
They can certainly look confusing if you’ve never encountered one before:
<?xml version="1.0" encoding="UTF-8"?>
<urlset xmlns="http://www.sitemaps.org/schemas/sitemap/0.9">
	<url>
		<loc>https://seosherpa.com/</loc>
		<lastmod>2022-01-26T19:12:36+09:00</lastmod>
                <changefreq>Daily</changefreq>
                <priority>1</priority>
	</url>
	<url>
		<loc>https://seosherpa.com/services/</loc>
		<lastmod>2021-11-16T13:21:20+09:00</lastmod>
                <changefreq>Daily</changefreq>
                <priority>0.8</priority>
	</url>
</urlset>
However, when you know what each of these components means:
- XML declaration
- URL set
- URL
- Last modified
- Priority
- Change frequency
XML sitemaps are pretty straightforward.
Let’s break each one down:
XML Declaration
In simple terms, the XML declaration tells search engines they are reading an XML file.
<?xml version="1.0" encoding="UTF-8"?>The XML declaration also states the XML version and character encoding used.
- The version should be 1.0
- The encoding must be UTF‑8.
Place the XML declaration at the top of the sitemap.xml file.
URL Set
The URL set is a container for all the URLs in the sitemap.
It begins by stating which protocol standard the sitemap.xml uses:
<urlset xmlns="http://www.sitemaps.org/schemas/sitemap/0.9">You’ll notice the protocol mentioned in the example above is the 0.9 standard.
Google, Yahoo, and Microsoft support this sitemap standard – it’s the one I recommend you use.
It’s important to note the urlset gets closed at the bottom of the XML document:
</urlset>This short snippet of code tells search engines the URL set has ended.
URL
The <URL> tag is the parent tag for each URL in the XML sitemap:
<url>
<loc>https://seosherpa.com/services/</loc>
</url>
Between the opening <url> and closing </url>, you must state the location of the URL in a nested <loc> tag.
What’s critical here is that you state the absolute URL, including its HTTP:// or HTTPS:// protocol.
In other words, list the URL exactly as it would appear in a web browser.

On the other hand, relative URLs like /services/ will not get recognized.
The URL location is the only attribute that MUST be stated between the URL tags.
But with that said, there are an additional three (optional) properties that can be included:
Last Modified
The <lastmod> tag determines when the content on that URL was last changed.
<lastmod>2022-01-26T19:12:36+09:00</lastmod>Let’s say you updated a blog post on 10th January 2022; the <lastmod> attribute would read 2022-01-10.
It tells search engines when the content on that URL was last revised, which in theory, influences when a search engine recrawls that page.
You can also state the time, but it’s unnecessary.
Whether you include only the date or the time as well, be sure to use “W3C datetime” format.
It’s the only format that’s recognized for the <lastmod> tag in a sitemap.xml.
Priority
The <priority> tag specifies the priority of the URL relative to all other URLs on the website.
<priority>0.8</priority>In other words, it allows you to tell search engines which URLs should get precedence when they allocate crawl budget to your site.
Priority values can be set from 0.0 which is the lowest priority, to 1.0 which is the maximum.
Trouble is, Google ignores the <priority> in XML sitemaps, because in Gary Illyes’ words “it’s a bag of noise.”
So there really is no point in setting priority at all.
Change Frequency
Whereas, the <lastmod> tag determines when the content on that URL was last changed…
The <changfreq> tag states how frequently the content is likely to change.
<changefreq>Daily</changefreq>Its purpose is to give search engines some idea as to how often they might want to recrawl the URL.
Change frequency in an XML sitemap can be set to any of the following values:
- always
- hourly
- daily
- weekly
- monthly
- yearly
- never
If the tag was set to <changefreq>Weekly</changefreq> a search engine may want to recrawl that URL every seven days.
Doing so more frequently than that would be wasteful as the content is unlikely to vary.
However <changefreq> is obsolete as far as Google is concerned:
Since most sitemap generators do a horrible job of matching the <changefreq> tag to the actual frequency of change, it’s easy to understand why.
You can omit the change frequency attribute from your sitemap.xml.
XML Sitemap Examples
Now that we know what makes an XML sitemap, let’s take a look at some sitemap.xml examples as they appear in the real world.
Here is the XML sitemap for Gymshark’s pages:
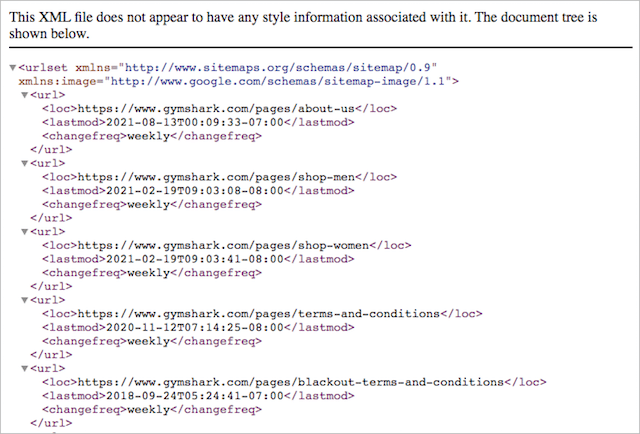
This sitemap could be improved by removing <changefreq> since it’s ignored by Google, and by adding an XML declaration at the beginning of the sitemap XML.
(Including an XML declaration is best practice for all sitemaps).
Here is another XML sitemap example, this time from yasisland.ae
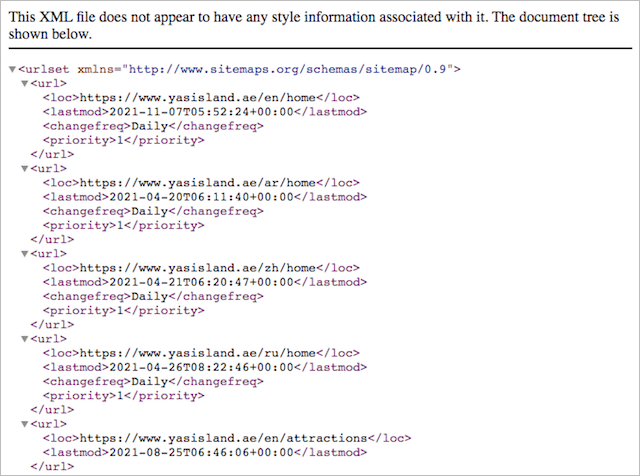
Like Gym Shark’s sitemap, this sitemap can be enhanced by adding the XML declaration at the beginning.
In addition, Change Frequency and Priority can be removed since they are redundant these days.
Other than that, these XML sitemaps are set up correctly.
So at this stage, you are probably asking yourself:
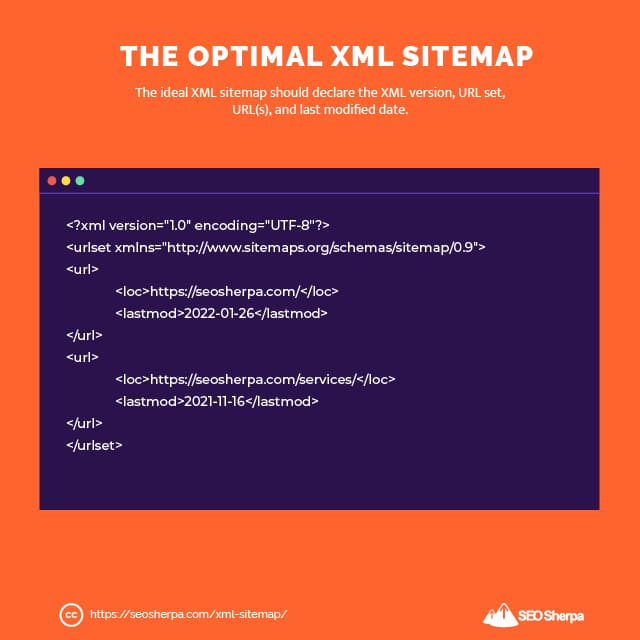
What does the optimum XML sitemap look like?
Something like this:
<?xml version="1.0" encoding="UTF-8"?>
<urlset xmlns="http://www.sitemaps.org/schemas/sitemap/0.9">
	<url>
		<loc>https://seosherpa.com/</loc>
		<lastmod>2022-01-26</lastmod>
        </url>
	<url>
		<loc>https://seosherpa.com/services/</loc>
		<lastmod>2021-11-16</lastmod>
	</url>
</urlset>
It should contain:
- XML declaration (version)
- URL set
- URL(s)
- Last modified (date only)
And, that’s really all.
Why Do I Need an XML Sitemap?
As I explained earlier, a search engine discovers content on the web by crawling from one webpage to another using bots often referred to as “spiders”:
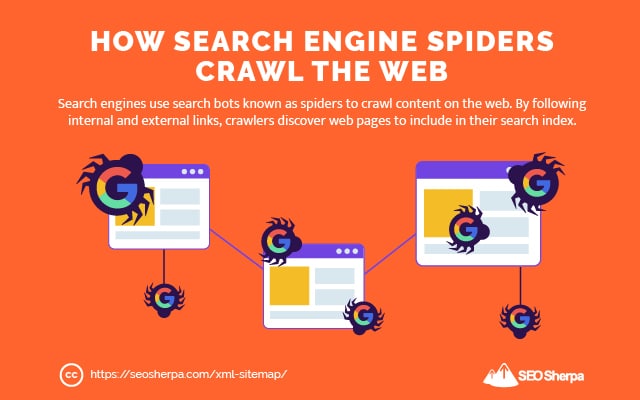
When these spiders discover a new page via an internal or external link, they add that page to their index.
But the issue with crawling?
Search engines cannot find all of the content on the web that way.
If a web page isn’t linked via another known page, a search engine won’t find it.
This is where an XML sitemap comes in.
XML sitemaps act as insurance for crawling, by informing search engines where to find the most important pages on your website so they aid content discovery and indexation.
This is critical because search engines cannot rank your content without first indexing it.
What Type of Websites Need an XML Sitemap?
If you follow Google’s advice, XML sitemaps are best for:
- Large websites with thousands of pages
- Websites with extensive archives
- Websites with lots of rich media content
- Websites with no or very few backlinks
But here’s the thing:
All websites benefit from having an XML sitemap.
When you include an XML sitemap, search engine bots can better understand the structure of your site, discover your content – and know when it was last updated.
Even if you have a single-page website, including an XML sitemap is probably worth it.
Which Pages Should You Include in Your XML Sitemap?
The short answer:
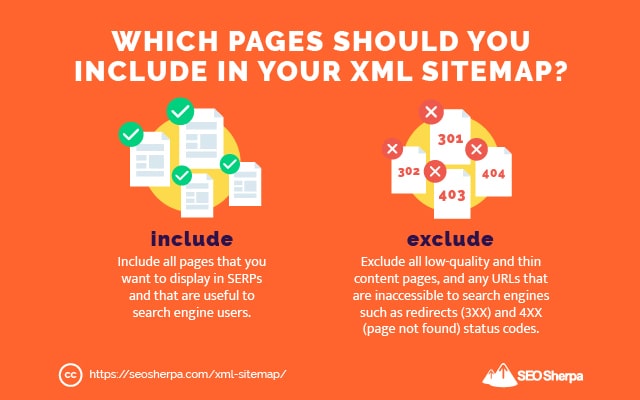
Include any pages you want to display in search results in your XML sitemap and leave everything else out.
In other words, your sitemap should only include pages that have utility. Things like:
- Homepage
- About page
- Product pages
- Service pages
- Contact page
- Blog posts
Generally speaking, you wouldn’t include pages like:
- Thank you pages
- Tag pages
- Private media files
These are all examples of URLs you wouldn’t want showing up in search results.
But remember, just because you omit a page from your sitemap doesn’t mean it won’t get indexed.
If the page has links pointing to it, there’s a chance that Google (and other search engines) will crawl, index, and display that page in search engine results.
To ensure the removal of a page from search results, omit the page from your XML sitemap and add a no-index tag to it.
And this brings me to my next point:
Every page in your XML sitemap must be indexable.
Your sitemap should never contain pages that return these status codes:
- 404 – Page not found
- 301 or 302 – Page moved to another location
4XX and 3XX status codes tell search engines there is no page there.
And, if there is no page on that URL, it is not indexable.
Furthermore:
Every page must be accessible to search engine crawlers.
In brief, robots.txt isn’t blocking the page, and there there are no directives (such as meta robots, canonical links, or x-robots-tags) telling search engines not to index the page.
Now that you know what gets included in an XML sitemap, let’s discuss how you create one.
How to Create an XML Sitemap (2 Methodologies)
If you’ve built your website using a content management system like Shopify or Wix, then you don’t need to create an XML sitemap, because your CMS’ will generate a sitemap for you.
The XML sitemap on these platforms (and others like them) is automatically updated when pages get added – or removed – from the site.
If your CMS doesn’t do this, then there’s usually a plugin that will do it for you.
On the other hand, if you are not using a CMS, then you will need to create an XML sitemap manually.
Let’s break the process down:
How to Create an XML Sitemap Manually
If you are concerned you are going to have to code the XML sitemap by hand, don’t worry!
This process isn’t really manual.
We are going to use Screaming Frog to do most of the work for you.
The first step is to install the Screaming Frog SEO Spider.
Tip – you can use the free version if your website is fewer than three hundred pages.
Once installed, navigate to ‘Mode’ then ‘Spider.’
Next, drop your homepage URL in the box marked ‘Enter URL to spider.’
Then, hit ‘Start.’
Screaming Frog will then begin to crawl your website.
Once the crawl is completed, next we adjust some settings:
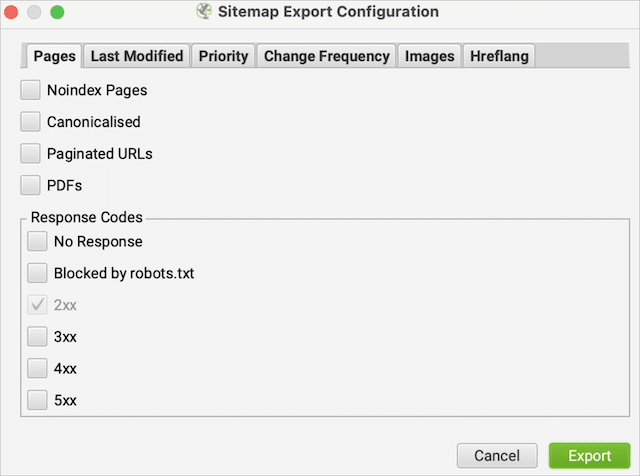
Because Google doesn’t use <changefreq> and <priority> I recommend excluding those tags from the sitemap file.
I also suggest omitting <lastmod> from your XML sitemap if you are creating an XML sitemap manually.
Why?
Because it’s a real pain having to rebuild the XML sitemap each time you make minor changes to a page.
Excluding <lastmod> from your XML sitemap will mean you don’t have to.
Before you extract the sitemap file, you can add, edit or delete URLs depending on what you want search engines to crawl and index.
Once you’re done fine-tuning your sitemap, you can then upload it to the root folder of your website, with “sitemap.xml” as its filename.
Pretty simple, right?
How to Create an XML Sitemap in WordPress
It might come as a surprise, but an “out-of-the-box” WordPress install doesn’t come with an XML sitemap creator.
To generate an XML sitemap in WordPress you’ll need a plugin, like Yoast SEO.
Here’s how to add Yoast to your website, if you don’t have it installed already:
Inside your WordPress dashboard go to ‘Plugins’ and then ‘Add New.’
Next, search for “Yoast SEO.”
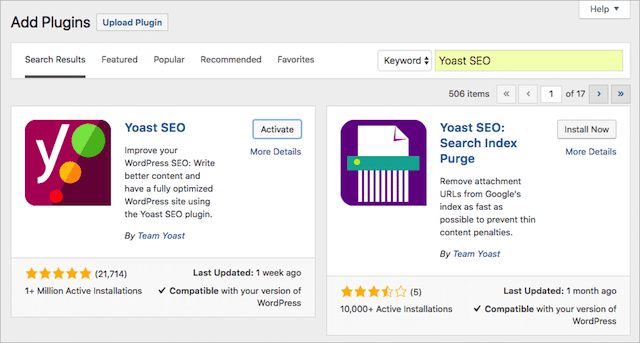
Then click ‘Install now’ on the first result, then ‘Activate.’
Once Yoast is installed, navigate to the Yoast settings, and select ‘SEO’ then ‘XML Sitemaps’ and then ‘General.’
On this tab, make sure ‘XML sitemap functionality is set to “enabled.”
With XML sitemaps turned on, you should now see your sitemap index at yourdomain.com/sitemap_index.xml.
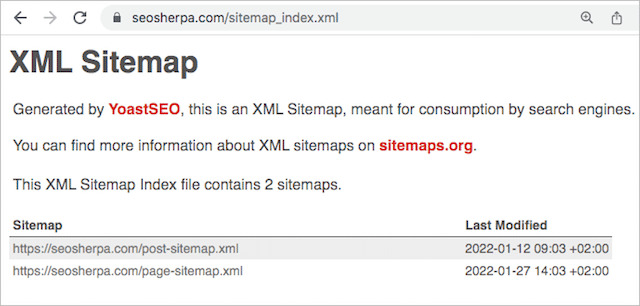
Thankfully Yoast automatically excludes non-indexable pages (e.g., those with “no-index” meta robots tag) from being included in the sitemap. With that being so, the standard setup should be fine in most cases.
Should you wish, however, you can choose to exclude certain post types and taxonomies to optimize your sitemap further:
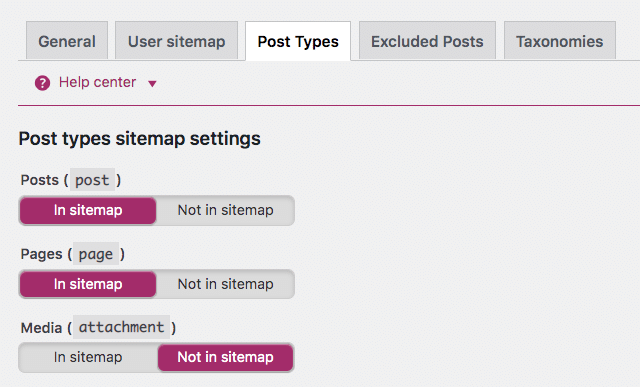
For the SEO Sherpa site, I have excluded media and tags from my sitemap, because in my case at least, these pages have little value to end-users.
How to Create an XML Sitemap in Wix
In contrast to WordPress, Wix does have XML sitemap functionality built-in.
The trouble is, it’s pretty limited.
The only option you have is to exclude certain pages.
If you want to exclude a page, head to the “SEO (Google)” settings tab for the page and turn the “Show this page in search results” switch off.

This adds a noindex meta tag to the page AND excludes it from the XML sitemap.
One challenge with Wix’s rigid sitemap functionality is that it includes URLs that have been canonicalized to another page.
This essentially says “rank this page” and “don’t rank this page” at the same time which is super confusing for search engines.
The result of this could be the wrong version showing up on search results pages.
If you have a Wix website, you can find teh automatically generated sitemap at yourdomain.com/sitemap.xml.
How to Create an XML Sitemap in Shopify
You don’t need to create an XML sitemap if your site’s built with Shopify, it’s done for you automatically.
Unfortunately, though, there is zero customization possible.
With Shopify, you cannot even exclude a page from your XML sitemap – everything’s included.
The only way to control what shows up in search results is to add a noindex tag to the .liquid files directly.
Still, in Shopify no-indexed pages will display in the sitemap XML, which as we pointed out earlier isn’t ideal.
Find your sitemap at yourdomain.com/sitemap.xml.
How to Submit Your Sitemap to Google
By now, you should have your sitemap created.
The final (and possibly most important) step is to submit your sitemap to Google.
Of course, before doing that, you need to know where your sitemap is located.
If you have created your sitemap manually, or you are using Wix or Shopify, then your sitemap can be found on the following URL:
yourdomain.com/sitemap.xml
On the other hand, if you’re site is on WordPress and you’ve used Yoast for your sitemap.xml, then you’ll find the sitemap index at this URL:
yourdomain.com/sitemap_index.xml
If you are using some other platform – or cannot find your sitemap in either of those locations, you can check for your sitemap using our SEO grader tool:
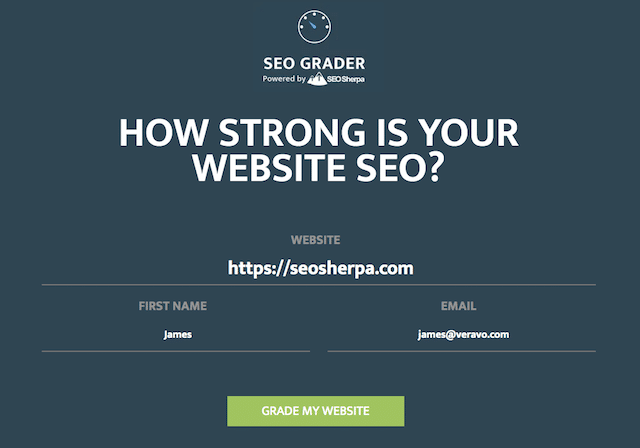
Once you know where your XML sitemap is located, go to Google Search Console then ‘Sitemaps’ which you’ll find under the ‘Index’ menu.
Next, paste your sitemap URL into the sitemap field and hit “Submit.”
Your sitemap “should” submit successfully:

And, with that, you are done!
7 “Essential” XML Sitemap Best Practices
Let’s finish up with a string of XML sitemap best practices.
You’ll want to execute these techniques to be sure your XML sitemap is optimized for effective crawling and indexing.
Let’s jump in.
(1). Use a Dynamic Sitemap NOT a Static Sitemap
Imagine having to manually update your XML sitemap whenever you made changes to your website?!
Well, thats exactly what you’d have to do with a static sitemap.
Thankfully, most modern CMS have dynamic XML sitemap functionality built-in – or available via a plugin.
Which means:
Your sitemap will auto-update whenever you add, change, or remove existing pages.
No manual intervention is needed.
Using a dynamic sitemap is especially important for large websites where priority pages are added frequently.
Make sure you use one.
(2). Use the Standard Sitemap Location and Name
If you were to utilize /my_website_sitemap.xml as the path for your XML sitemap, there’s a chance that search engines won’t find it.
To ensure your sitemap is easily discovered, stick to standard locations:
https://yourdomain.com/sitemap.xml for single sitemaps
OR
https://yourdomain.com/sitemap_index.xml when you have multiple sitemaps in an index.
It’s that simple.
(3). Reference Your XML Sitemap in Your Robots.txt File
Your robots.txt file is visited by search engine robots when they begin their crawl of your website.
They use robots.txt to understand how to crawl the site.
By referencing your XML sitemap inside the robots.txt file, you ensure search bots can find it.
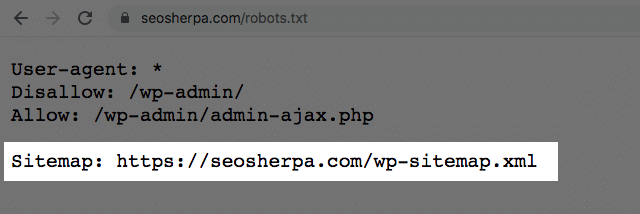
To add your XML sitemap to robots.txt, open the robots text file and paste this line into it:
Sitemap: https://www.yourdomain.com/sitemap.xmlYou can find the robots.txt file in the root directory of your server on the “/robots.txt” path.
If you have multiple XML sitemaps simply list them one by one like so:
Sitemap: https://www.yourdomain.com/page-sitemap.xml
Sitemap: https://www.yourdomain.com/post-sitemap.xml
Sitemap: https://www.yourdomain.com/product-sitemap.xml
While in theory, you can place the sitemap location anywhere within robots.txt it’s generally best placed at the end:
(4). Exclude Noindex Pages from Your Sitemap
The role of an XML sitemap is to tell search engines what to crawl – and index.
That means, only your preferred rank-worthy pages should be included.
Adding Noindex, non-canonical, or redirecting pages to your sitemap will confuse search engines and could negatively affect your crawl budget.
(5). Keep Your XML Sitemap Below 50MB
According to Google, an XML sitemap should not exceed 50MB or 50,000 URLs.

Whenever you exceed either the 50MB or 50,000 URL limit, you should divide your single XML Sitemap into multiple XML sitemap files.
Surpassing these limits may lead to Google ceasing its crawl.
For instance, you could split your sitemap into “posts” and “pages.”

And then group them together in a Sitemap Index file.
(6). Ignore Priority and Changefreq Attributes
As I pointed out earlier, Google overlooks both these tags:
- <changefreq>
- <priority>
This means, including Change frequency and Priority attributes, only adds up to unnecessary weight in your sitemap, which can lead to crawl budget and indexing issues.
I recommend you do not use <changefreq> or <priority> tags in your sitemap at all.
(7). Monitor Google Search Console for XML Sitemap Errors
If Google is unable to crawl your XML sitemap, it will tell you via Search Console:

Errors could be as straightforward as the XML sitemap URL not being fetchable, to submitted URLs returning 404 status codes or no-index.
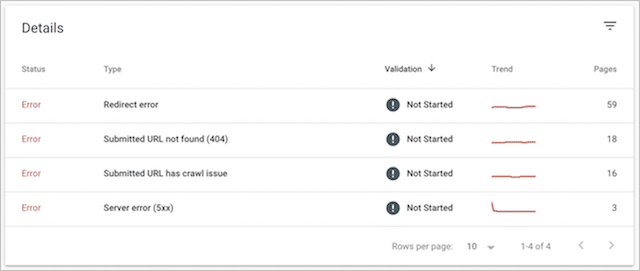
The most frequent issues tend to be:
(a). Submitted URL not found (404)
This means a URL you submitted in your XML sitemap does not exist.
Remember, if you remove a page from your website don’t forget to remove it from your sitemap. Better still, use a dynamic XML sitemap and the URL will get removed from your sitemap automatically.
(b). Submitted URL marked ‘noindex’
This occurs when a page in your XML sitemap has a ‘noindex’ meta tag.
If you want this page to be indexed, you must remove the ‘noindex’ meta tag. If you don’t want it indexed then remove it from your sitemap.
Either way, it needs to be fixed.
(c). Submitted URL blocked by robots.txt
This transpires when a page contained in your XML sitemap is blocked by robots.txt.
Basically, there is a directive in your robots.txt file telling search engines not to crawl the page, even though you’ve asked search engines to do just that by submitting it to be indexed.
If you do actually want the URL indexed, find and remove the directive from your robots.txt file.
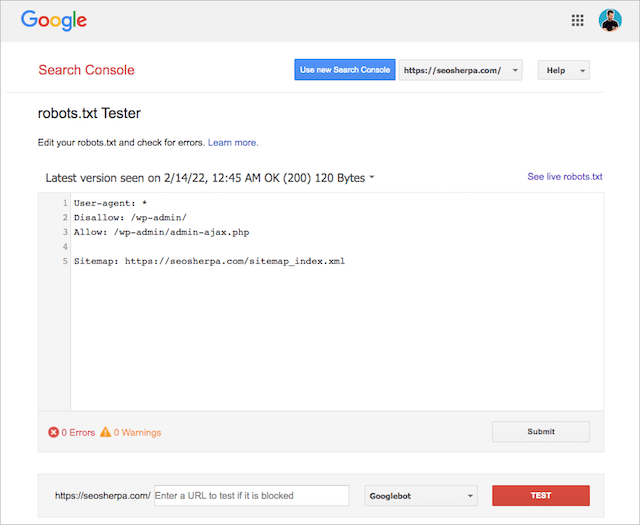
Try testing your page using the robots.txt tester to uncover the culprit.
And there you have it; seven XML sitemap best practices.
What Do You Think?
Now I’d like to hear from you:
Which technique from today’s post are you going to use first?
What changes are you going to make to your XML sitemap as a result of reading today’s post?
Perhaps you are going to switch from a manual to an automated XML sitemap? Or, maybe you are going to omit the <changefreq> tag?
Either way, let me know by leaving a comment below.


Leave a Reply